MidVision RapidDeploy for MQ on Windows on AWS
Amazon EC2 Installation guide
1. Overview
This guide will provide step by step instruction on how to start using the installed products on your AWS EC2 instance.
This AMI contains a ready-to-run MidVision RapidDeploy for MQ on Windows on AWS base image at the selected version.
In order to use this image, you need to launch it with your selected type and log in using remote desktop to activate (start) the WebSphere servers.
2. Launching an instance
In order to launch the instance, a few settings need to be configured on the AWS console as follows. The instructions for launching an instance differ depending on where you launch from. Initially, you will launch the instance from the AWS Marketplace.
-
Select the Product based on your requirements in the AWS Marketplace;
-
Click on the link to go to that versions page in AWS Marketplace;
-
Check the ‘
Other Versions‘ link to see other versions available (you can select the actual version later). -
Under ‘
Pricing Details‘ panel select your Region and either Hourly or Yearly fees. -
Click on the ‘
Continue‘, button to go to the ‘1-Click Launch‘ tab on the configuration page; -
On the ‘
Software Pricing‘ panel choose your instance type and pricing type; -
On the ‘
Version‘ panel, select the fix pack version you require; -
On the ‘
Region‘ panel, select the Region you require; -
On the ‘
EC2 Instance Type‘ panel, choose the instance type. Them3.largetype or larger is recommended when running IBM WebSphere MQ. Larger instances may be required based on the number of IBM WebSphere MQ queue managers etc required and the expected resource use of each; -
On the ‘
VPC Settings‘ panel Configure the VPC settings to your requirements or leave the defaults; -
On the ‘
Security Group‘ panel, specify the security group. The security group needs to permit to following ports [note that the internal firewall will be configured later to permit only ports used by WebSphere]:Port 22 to connect via SSH (enabled by default),
Port 9090 to reach RapidDeploy web console, Port 20000 and 20100 to open for RapidDeploy Remote Agent (optional)
- If you don’t already have a security group as above, go to your EC2 Control Panel and select ‘
Security Groups‘ under ‘Network & Security‘ - Click ‘
Create Security Group‘ button - To open all ports, Click ‘
Add Rule‘. - In the ‘
Type‘ dropdown, Specify ‘All TCP‘ or your preferred configuration. - In the ‘
Source‘ dropdown, Specify ‘Anywhere‘ or your preferred configuration.
- If you don’t already have a security group as above, go to your EC2 Control Panel and select ‘
-
On the ‘
Key Pair‘ panel, select a key pair to use. You will need this key later to connect to the instance. -
Scroll back to the top of the page and click ‘
Accept Software Terms and Launch with 1-Click‘. -
The instance will be launched.
-
Select the AMI based on your requirements;
-
Right click on the AMI, or from the drop down menu, choose the ‘
Launch’ option; -
On the ‘
Choose Instance Type‘ tab, choose the instance type. Them3.largetype or larger is recommended when running IBM WebSphere MQ. Larger instances may be required based on the number of IBM WebSphere MQ queue managers etc required and the expected resource use of each; Click ‘Next: Configure Instance Details‘. -
On the ‘
Configure Instance‘ tab Configure the instance to your requirements or leave the defaults. Click ‘Next: Add Storage‘. -
On the ‘
Add Storage‘ tab, add additional storage as required or leave as default. Click ‘Next: Tag Instance‘. -
On the ‘
Tag Instance‘ tab, Tag your instance with a suitable name. Click ‘Next: Configure Security Group'. -
On the ‘
Configure Security Group‘ tab, specify the security group. The security group needs to permit to following ports:Port 22 to connect via SSH (enabled by default),
Port 9090 to reach RapidDeploy web console, Port 20000 and 20100 to open for RapidDeploy Remote Agent (optional)
- To open all ports, Click ‘
Add Rule‘. - In the ‘
Type‘ dropdown, Specify ‘All TCP‘ or your preferred configuration. - In the ‘
Source‘ dropdown, Specify ‘Anywhere‘ or your preferred configuration.
- To open all ports, Click ‘
-
Click ‘
Review and Launch‘. -
Review settings, then click ‘
Launch‘. -
Add your key pair, Check the ‘Acknowledge key file access’ checkbox and click ‘
Launch Instance‘.
3. Initial login and setup
The products are shipped with a base binary installation but without the necessary Queue Managers created. On the first login to the instance, you will be placed into a console wizard, which will give you more information about the MQ installation. The following is an overview of the steps you will be guided through to get started with the installed products on the instance.
Once the instance has started up (you can see it by having ” 2/2 checks passed ” in EC2 console).
-
Log onto the instance using a remote desktop application:
- From the EC2 console select the instance and click on the “
Connect” button, click on the “Get Password” button, browse and select the key pair.pemfile, click on the “Decrypt Password” button, and use the generated password to connect to the instance using the desired remote desktop application.
- From the EC2 console select the instance and click on the “
-
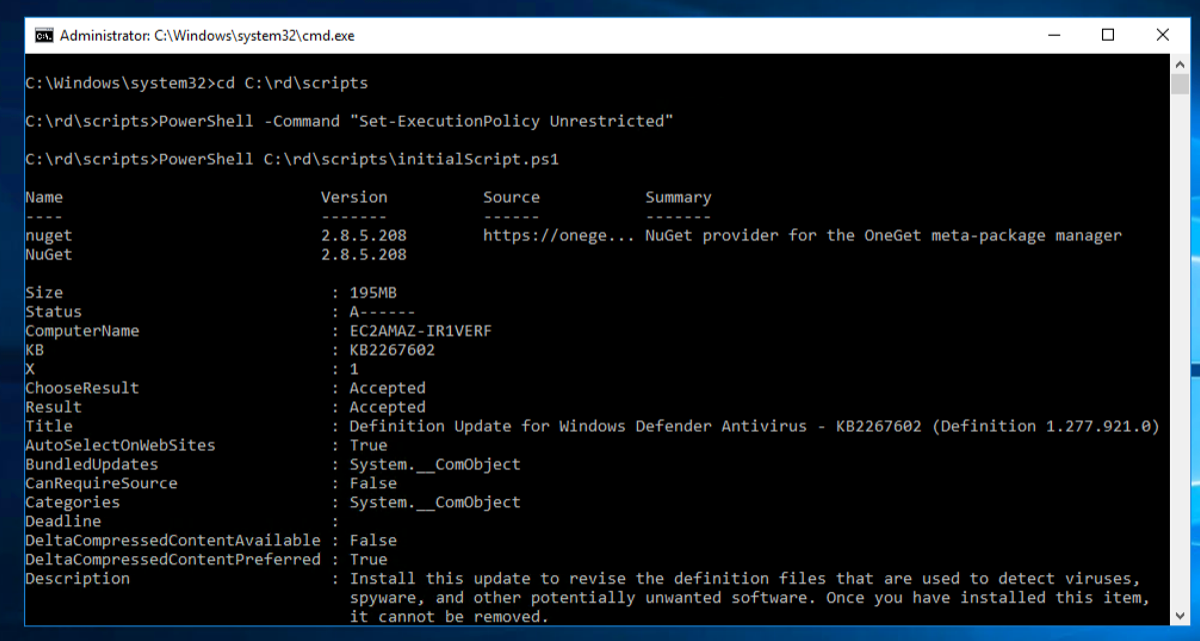
Wait until a “
cmd” window appears. You do not need to start a command window, it will appear once the instance is properly initialized. -
In order to make sure your OS is always up to date, at first login to the instance the OS is automatically upgraded with the newest Windows updates. If you log in just after the instance is launched you will probably see some logs related to Windows Update process.
-
This window will ask you if you want to IBM MQ installation info:
Welcome, this is MidVisionCloud IBM MQ image first run configuration Note that you can rerun this configuration wizard again by executing C:\rd\scripts\firstrunsetup.cmd script Configuration steps
- Show IBM MQ installation details
- Set RapidDeploy framework initial password Show IBM MQ installation details? [y/n]:
-
Type ‘
y‘ and hit[return]. You should see the following output. Depending on your instance type, the following output will be displayed over several minutes. -
Set the initial password for the RapidDeploy user “
mvadmin“. Hit[return]to accept the default of instance ID:Configuring password for RapidDeploy default user ‘mvadmin’ Set password for user ‘mvadmin’. Submit blank for default value of the instance id: i-06a9000c764988fdb
-
The correct URLs to access the WebSphere and the RapidDeploy servers are displayed:
Configuration finished, you may now start using IBM MQ and RapidDeploy services. RapidDeploy: ec2-54-221-87-90.compute-1.amazonaws.com:9090/MidVision Your IBM MQ installation is in C:\IBM\MQ
IMPORTANT!
Remember you need to have the necessary rules in the Windows firewall to access the MQ ports if necessary. In order to do this:
1. Open the tool “Windows Firewall with Advanced Security” in Windows
2. Select “Inbound rules“
3. Click on “New Rule...“
4. Select “Port” and click “Next“
5. Select “TCP” and set the “Specific local ports” to the necessary specific port values, by default it should be something like “9090,9080“, and click “Next“
6. You can leave the rest of the values by default on the following windows and assign a memorable name to the rule
4. Accessing the web consoles
4.1 Access the RapidDeploy Web Console
RapidDeploy server and agent will start up automatically when you start your instance. You can access the web console on:
http://[publicip]:9090/MidVision
Note: make sure you have port 9090 open in your Security Group when trying to access the RapidDeploy web console. You can log in with the administrative user ” mvadmin ” using your ‘[instance-id]‘ as password.
5. Maintaining the installation
The following sections cover some of the activities you might want to perform after the instance has been started.
Changing RapidDeploy initial password
For security reasons, you will need to change the default password (default value is ‘[instance-id]‘) for user mvadmin. You can change this password at any time by clicking the ‘mvadmin’ drop down in the top right hand corner and clicking ‘Change Password’.
6. Troubleshooting
6.1 Session loss during setup
If you lose the connection to the target instance during the first run setup script execution (e.g. as a result of a network problem), we advise you to delete and recreate the EC2 instance and run the script again.
6.3 Contacting MidVision support
Please visit our support website.